ISO is one of the three elements of the exposure triangle, and it determines how much light you are capturing with your sensor. The higher ISO, the more light you are capturing with your sensor and the more digital noise you will have in your image, especially if you’re underexposing and then correcting exposure during post processing. More on the best way to shoot high ISO – or shoot to the right – can be found in this important blog post. The thing to remember is not to be afraid of using high ISO, as with good exposure and post processing you can obtain very good quality images. Many photographers are still stuck in the film days or unfortunately have digital cameras with not the greatest high ISO capabilities. But nowadays we would expect most DSLR or mirrorless cameras of a semi-professional designation to have half decent capability to capture relatively good quality images at ISO1600 or even higher. Though a lot of misinformation gets spread by photographers with little knowledge of the subject matter.
Aperture is another of the three exposure triangle elements. It allows you to determine how much depth of field you will have on the near and far side of the point of focus. With long lenses, you usually don’t get much depth of field, especially with subjects that are close. But with birds in flight photography, your subjects will be mostly some distance away. To get a large bird, like a pelican or heron in flight, you can be even 30 meters from your subject. Not so, when it comes to smaller birds. Now the smaller they are, the harder it becomes to track them in flight when you want to get flight photos. That’s simply, because with long lenses, your angle of view is narrow, and when a subject moves fast, and close, then panning with the equipment becomes very, very difficult. The closer you are to your subject, the shallower your depth of field is when you use long telephoto or super telephoto lenses.

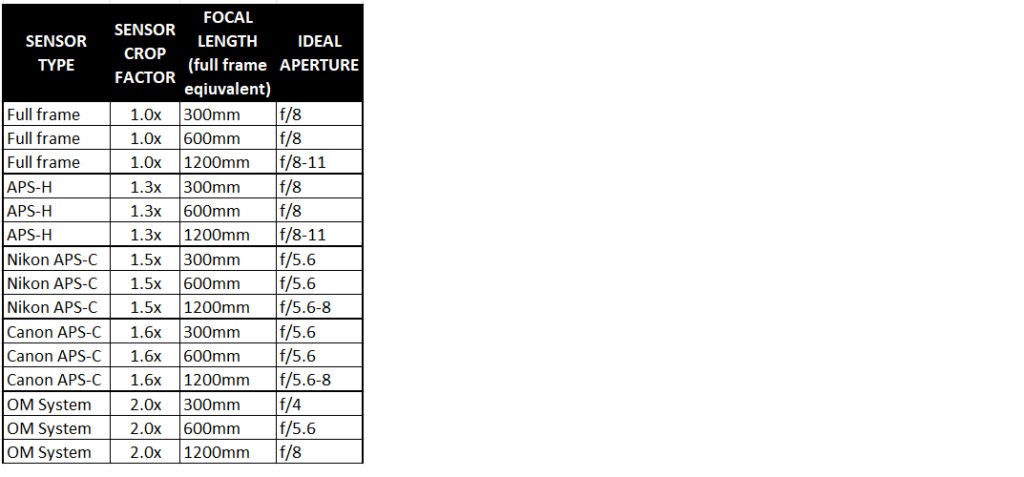
The below table is a guideline of ideal apertures to use with different lens focal lengths and different camera bodies (note the sensor size differences) where a bird fills at least half your full frame in the viewfinder. They are a good starting point, and if your shooting conditions allow for you to close the aperture down more (larger f/stop number, smaller opening) you can be sure to get better depth of field for your images.
Do note, that if we have a need to change exposure for a faster shutter speed in fading light, we will change the aperture first, rather than any other element of the exposure triangle. The crux of it is, that as long as the bird’s head and eye is sharp in the frame, the rest of the frame will still be acceptable. But what you will find, especially with larger birds up close, that once you start opening up your aperture (smaller f/stop meaning bigger opening to let more light in) you will ultimately compromise the depth of field available to you. In a perfect world, we would have all the elements in the right place to maximise the image aesthetics.

Shutter speed is the third element of the exposure triangle. It will be the element that freezes motion or allows for some blur of the subject, especially wing tips.

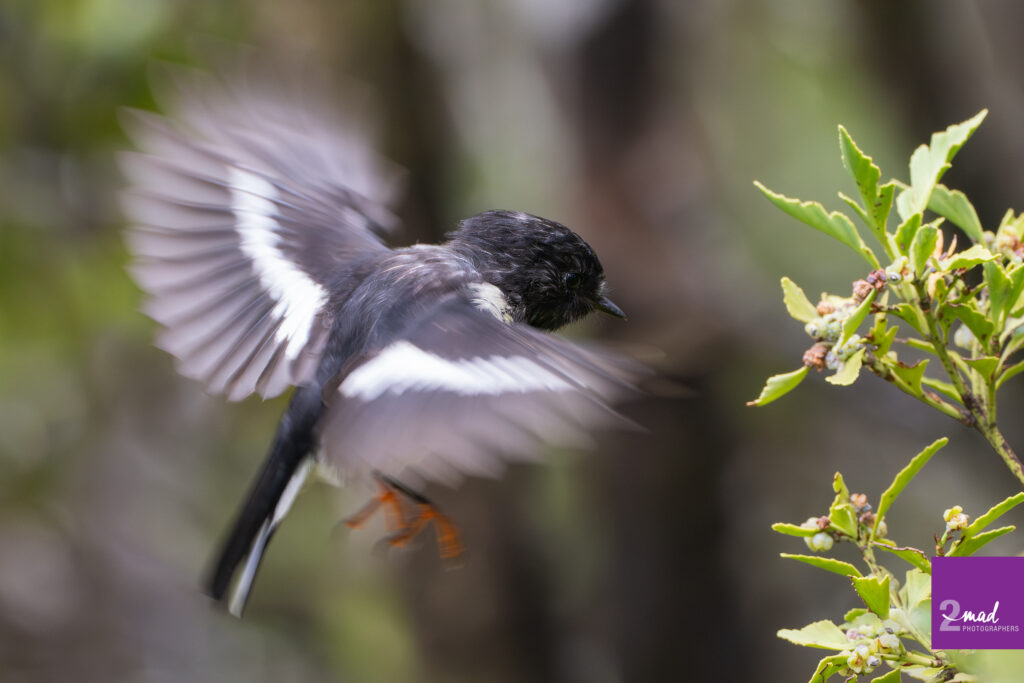
Images may be blurred for a number of reasons, such as poor hand holding technique that causes blur, or too slow a shutter speed being used to freeze a moment in time (like the Tomtit in the above image).
We could categorise shutter speeds into slow, fast and super fast speeds, and we use these based on what we want to achieve with our images and what kind of light we have avaliable.
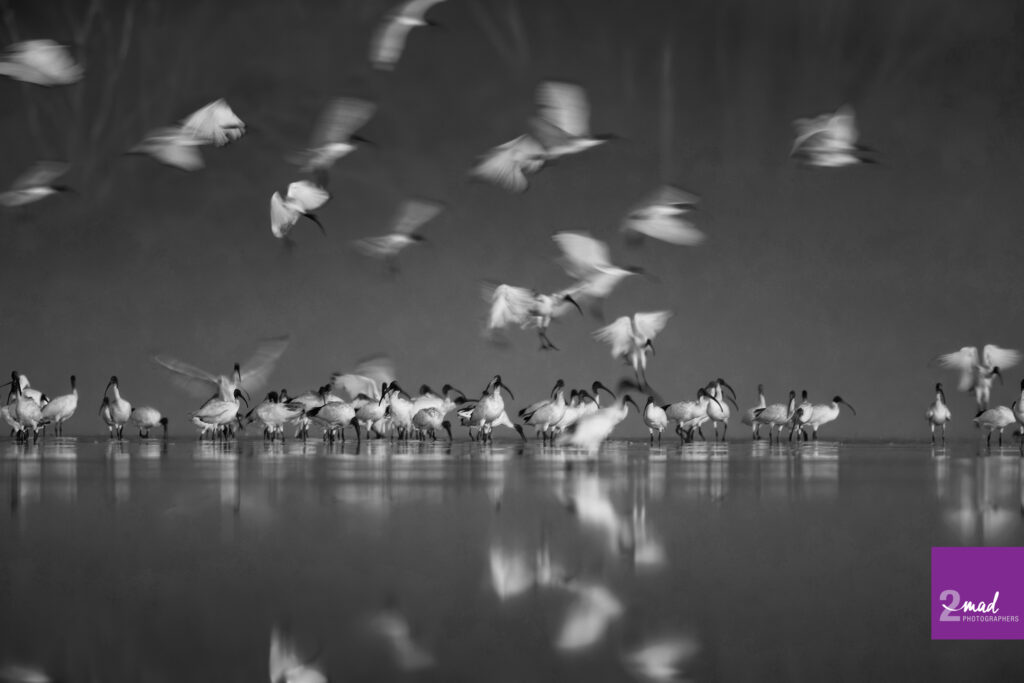
Slow shutter speeds can be used to introduce deliberate motion into the frame, something like these Australian White Ibis I photographed at a lagoon at dawn laying in the mud. There was absolutely not enough light to make a sharp image, so I decided to use 1/40th of a second to at least capture something.


The stationary birds on the mudflat look sharp, but you can see the motion blur that was introduced due to the very slow shutter speed actually caused the birds coming in to land to become blurred. I wanted to delete them, all of them. But Netra has a different perspective to me, and she said I was mad to do so. I kept the images. I converted this image to black and white, and it has been one of our best-selling photographs to date.

Don’t forget to check in next Tuesday for part 2 of 3.
Thank you and have a great week, stay safe!