There has been a huge shift in autofocus technology over the past ten years alone in the world of cameras. This makes the autofocus (AF) process faster, more accurate, and adaptable to a greater range of scenarios. Today’s cameras have complex contrast-detection and phase-detection AF systems, and in many of the most recent bodies these are used in parallel with innovative artificial intelligence algorithms such as subject detection. This incredible technology makes AF quick and precise, even in low-light or with fast-moving subjects.
Many of today’s cameras also have AF points covering the majority (if not all of) the viewfinder area, which means you can literally mostly worry about composing your image and the AF with AI and subject tracking takes care of applying the correct AF point to get a tack sharp image. Of course, your overall camera technique will also dictate whether you succeed or not, because all this technology is no panacea for poor technical skills and practice in the field. However, for those of us with enough time under our belts, the technology is making the taking of images possible, which were almost impossible ten or more years ago!
But, there are still times when even the most sophisticated autofocus systems (AF) can struggle to get sharp focus on our subjects. We tend to mostly use all the available technology with our OM System OM-1 camera bodies, which includes: subject detection, all AF points (there are 1,053 of them) and C-AF-TR (continuous auto focus with tracking). These settings tend to ensure that in the vast majority of instances we nail focus, or it would be better to state that the camera nails the focus for us.
When things get a bit tricky and we see AF struggles, we turn off all AI and tracking, and change the focus mode. Actually, we just change to a different custom mode where these features have been disabled.
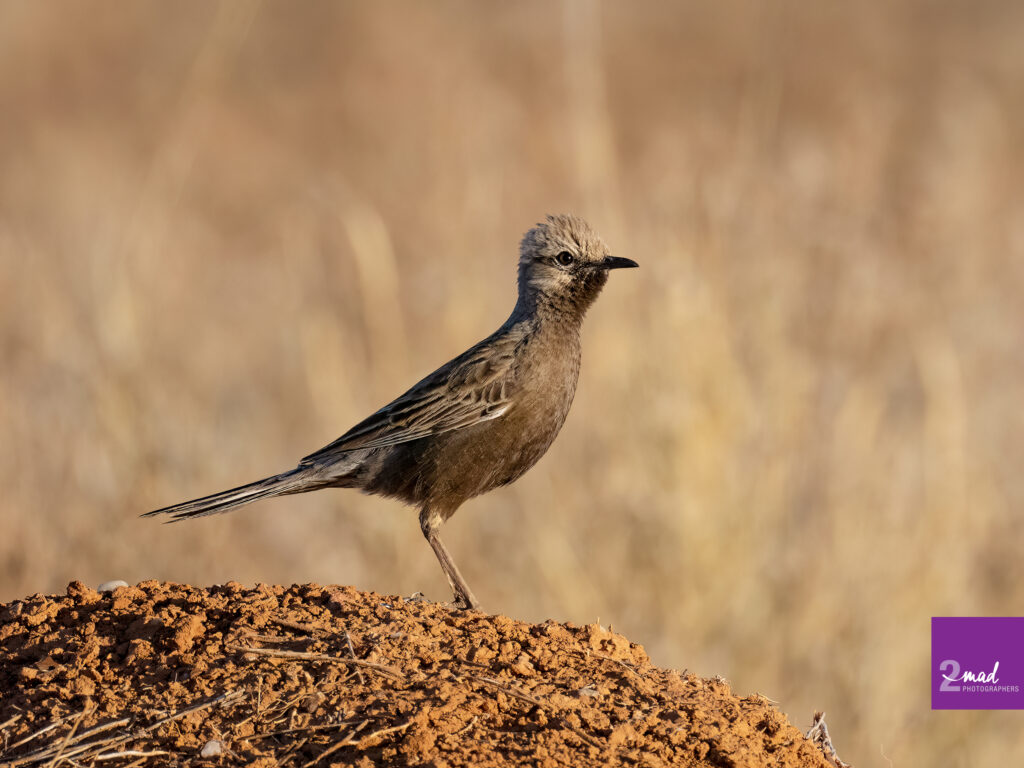
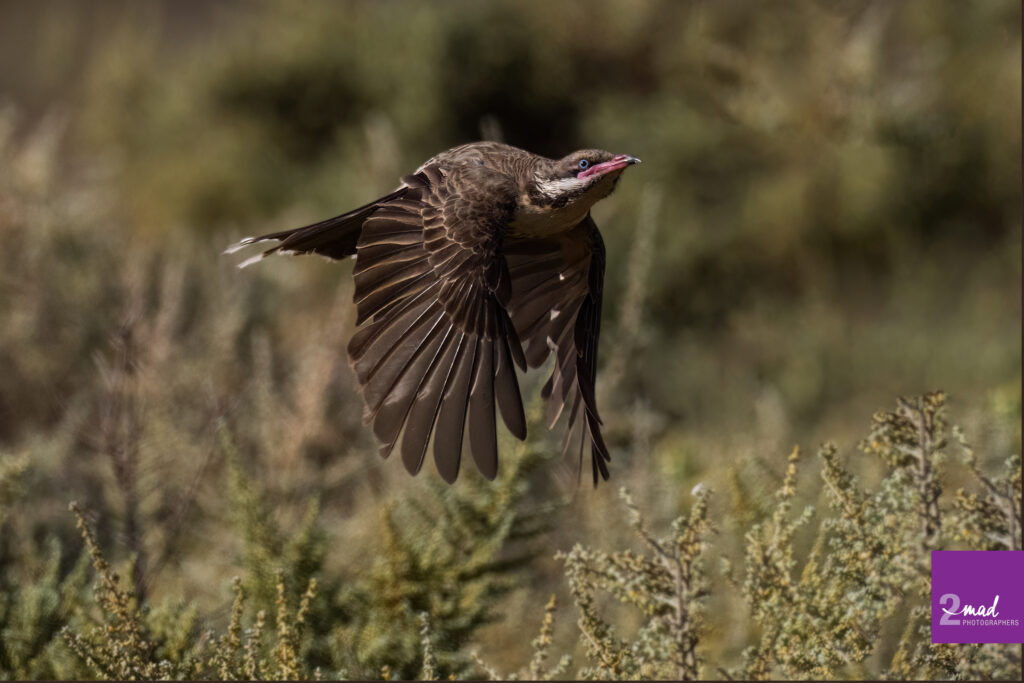
Let’s say there is a bird or animal in a spot with a lot of distracting elements, it may be hiding among branches or foliage and in low light. It is at times like this when we turn off all our subject detection and tracking and use the smallest AF point with S-AF (spot focus) instead of C-AF-TR (continuous autofocus with tracking). This is set via a custom mode, which is dead easy, just turn the main camera dial to the selected custom mode (C1 to C4, to whichever we set the parameters) and start shooting away. This method ensures that when we place that small point on the head of the bird or animal, it will focus as fast as possible. Naturally, really low light will still be a limitation, but relying on all the AI technology and tracking is not great in this kind of scenario.
Use AF/MF (that’s autofocus/manual focus) with a setting in the camera menu or by pressing a button on the lens or whatever method your camera manufacturer prescribes. Each brand may differ, so you need to dig deep and read your manual or use google to find your brand’s method. It simply means that you can swap between manual or autofocus to get that image razor sharp. Our OM System cameras have an option in the menu to enable the manual lens clutch operation. All that is, is on our main lens (the M.Zuiko 300mm f/4 Pro) the focusing ring can be pulled back and forth by about 5mm. This is what activates or deactivates the clutch mechanism that turns AF off and you can still use MF or use AF and assist with the focus ring to achieve sharpness if AF is failing you. If you disable the clutch via the user menu, only AF can be used, unless you switch from any of the autofocus modes to full manual focus in the QCP (quick control panel). The advantage of the enabled AF/MF clutch is, that while you are using autofocus, you can tweak focus if the camera is struggling, by manually focusing over the top of your autofocus. To our knowledge, only the M.Zuiko 40-150mm f/2.8 Pro and the M.Zuiko 300mm f/4 Pro lenses have the clutch function available in them. And it is a great additional tool to get sharp images consistently.
Use the focus limiter switch on the lens, if your lens has one of these. This functionality is great, because many super telephoto lenses can have a number of settings used by selecting one of two or three settings. Our M.Zuiko 300mm f/4 Pro lens has three options for limiting focus. 1.4m – 4m, 1.4m – ∞ and 4m – ∞. The way this helps is that if you know your subject may fall within a certain distance of you, by selecting one of the ranges, your AF will have far less to travel than if you’re trying to autofocus across the entire range of focus. In this lens, the closest focus is 1.4 meters. Therefore, if you selected the middle option (1.4m – ∞) and you were trying to focus on say a bird moving across the frame, the camera would take far longer to achieve critical focus. In our experience, we generally set the focus limiter to the third setting, that is: 4m-∞. As it is rare that a bird will fly within 4 meters of us.
You can also set the OM-1 camera’s internal focus limiter and assign its functionality to a button, which is what I have done. I will show you below what I did and for what reason. If you own a different brand camera, check your user manual. Alternatively, make google your best friend. You can find just about anything about anything on google, so start looking. You will be surprised.
OM-1 camera users, read on!
If you set the focus limiter on your lens to 1.4m – ∞, then you can go through your camera menu and configure three different settings to your distances. It’s a very smart way to reset the distance ranges that will not limit you what the lens dictates with its focus limiter switch.

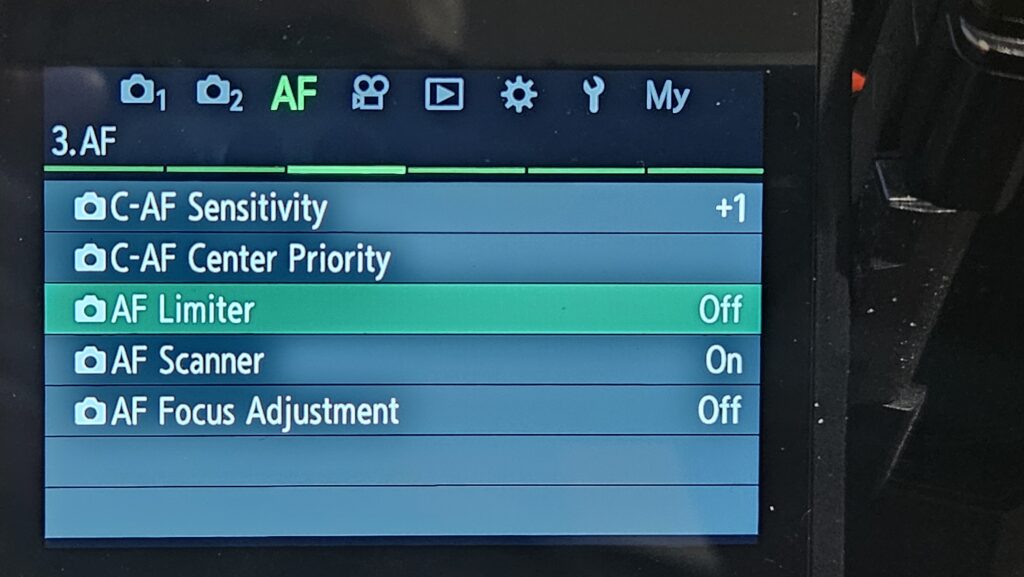
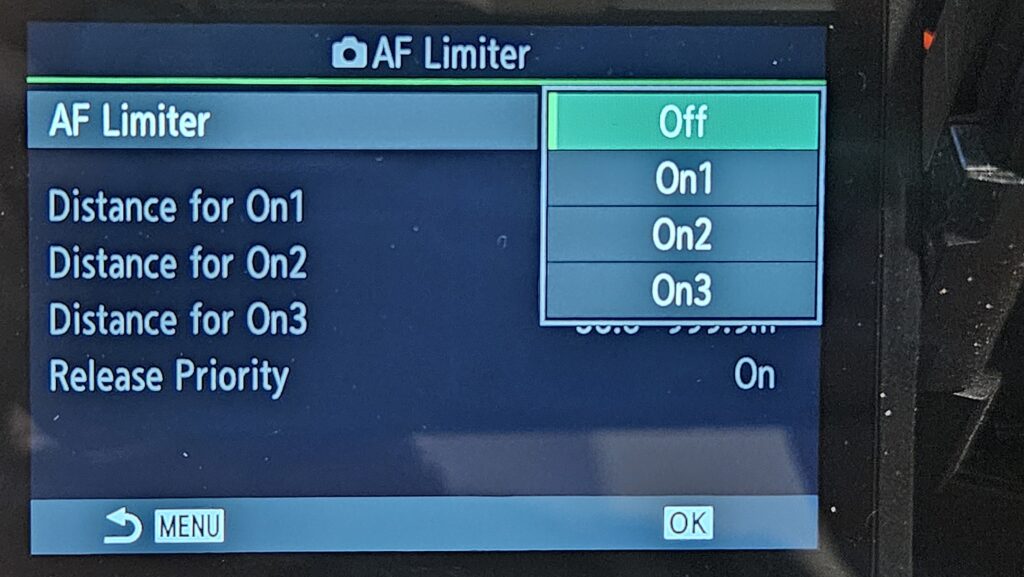
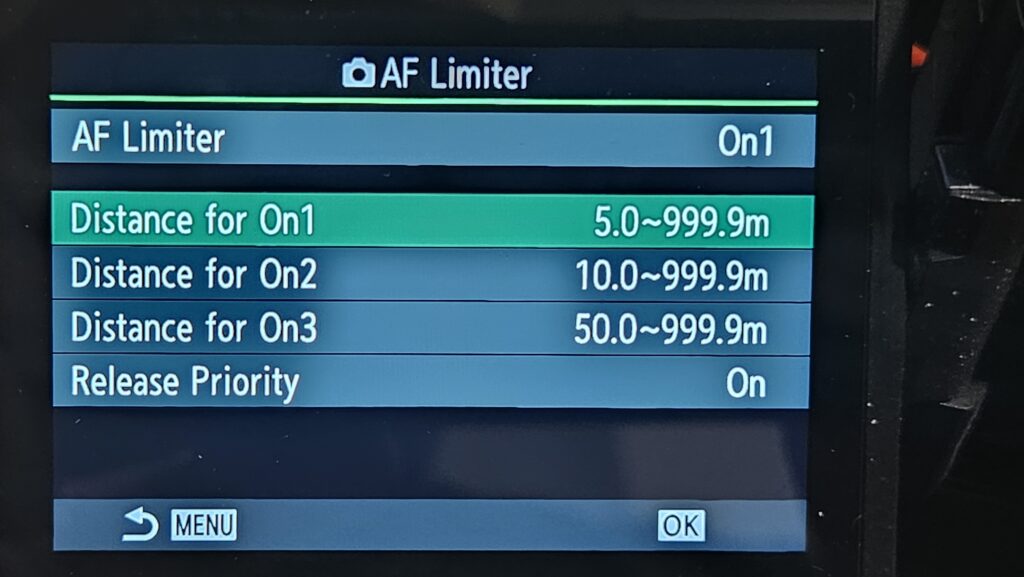
This first option allows you to select four things, no limiter, On1, On2 and On3, which would all have different distance range settings. Using this functionality this way, by scrolling through the menu to change settings every time is a waste of your time, so assigning AF Limiter to a button is a great idea. I’ll show you how to set that up. First you want to set the different distance ranges for the On1, On2 and On3 settings. We will deal with Release Priority after.
A great thing to note is, that each Custom Mode (C1, C2, C3 and C4) can have different AF Limiter settings, but you have to go into each custom mode to set each new one up, which is a bit time-consuming. However, once you’ve done that, you are good to go until you want to change everything again.
You can see the factory presets above for On1, On2 and On3. By highlighting one (navigate with the joystick) and pressing OK on the super control panel you’ll go into the settings for the selected option.
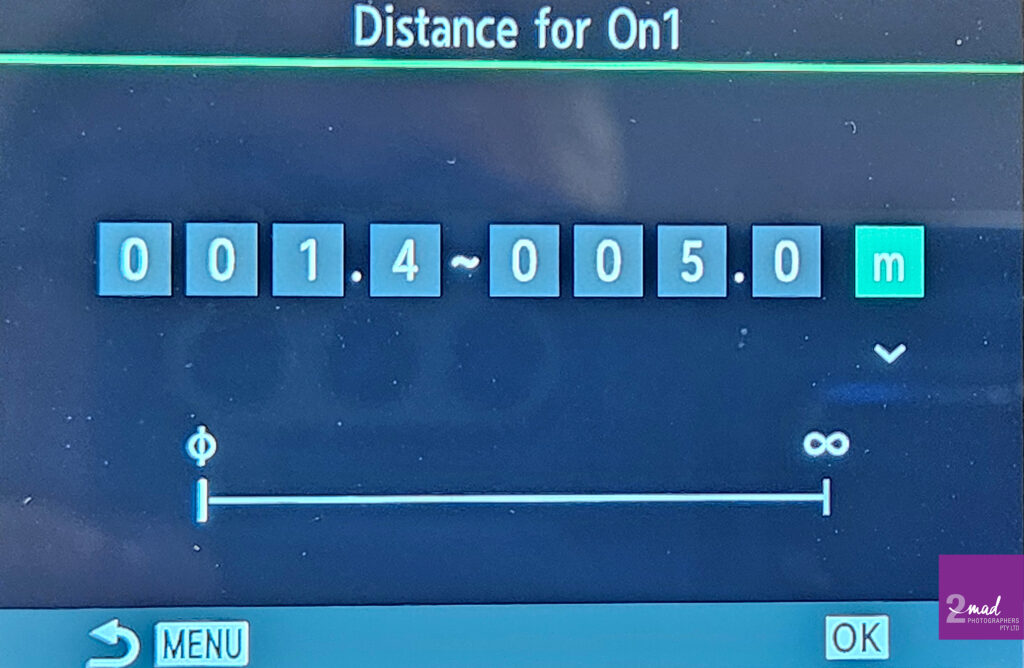
Once you have worked out how you want to set your distances and set them using the directional pad on the back of the camera, you can go to Release Priority and select OFF.
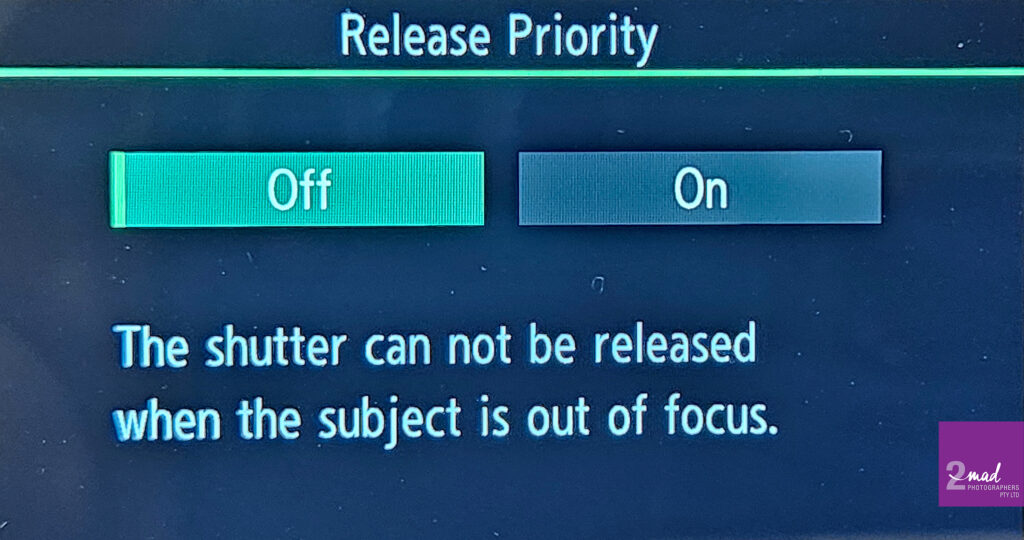
As you can see, setting it to OFF ensures that when the subject is not in focus, the shutter won’t activate. It is useful, so you save having unsharp images in your sequences. You will thank me for it when you are using 50 frames per second with C-AF (continuous autofocus).
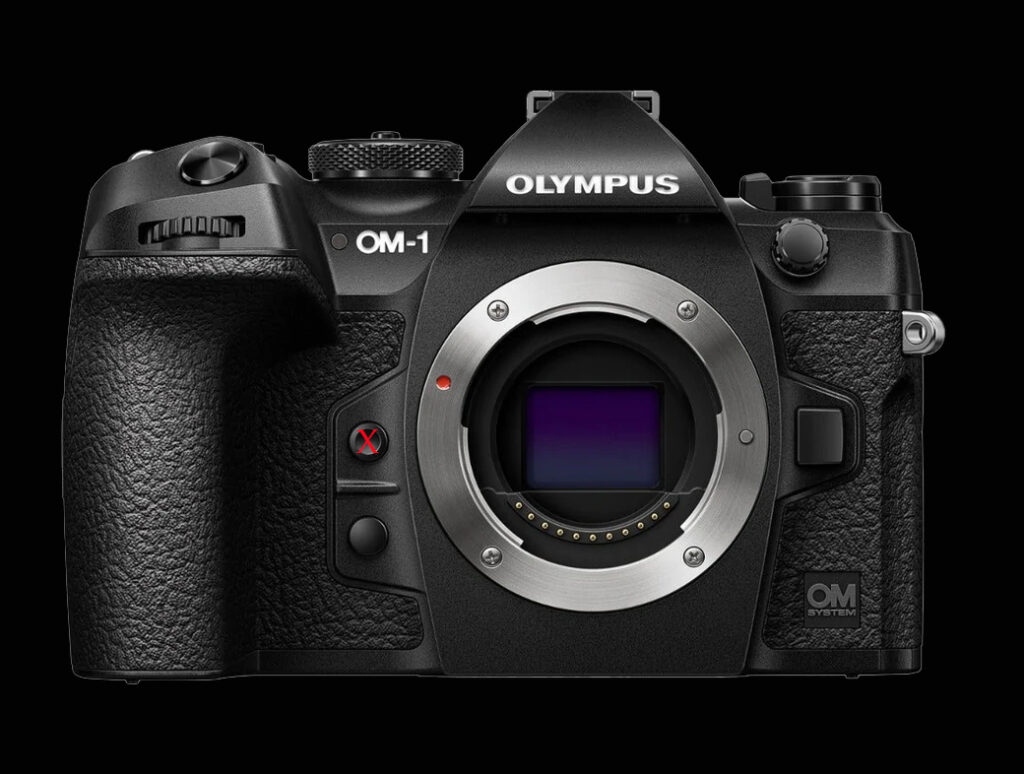
Now I have then gone into the menu again and set my One-Touch (White Balance) button to AF Limiter. So when in the field, I can press this button (see red X in image below) and select the distance ranges with the front wheel on the camera, as long as I’ve depressed the button. I worked out which two buttons can be operated simultaneously and easily with two fingers (usually my index and middle fingers). You should, by now, know how to assign functions to buttons on your OM-1 camera. If you don’t, you can find all the information in your camera manual, or via google.
We hope, that you’ve gotten something valuable out of this blog post. If you would like to join us on our Bird Photography for Beginners workshop mid-March, please press the below link that will take you to the page with all the info. Thank you!